skip to main |
skip to sidebar
If your mind went in the gutter, please remove it now! :)
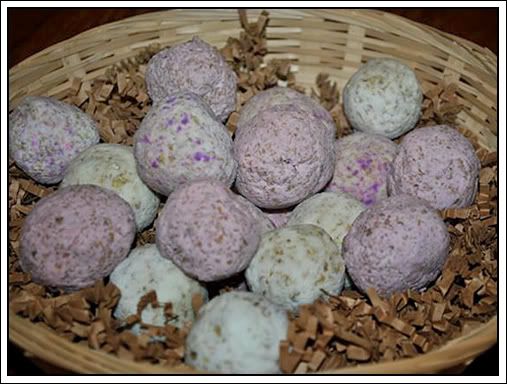
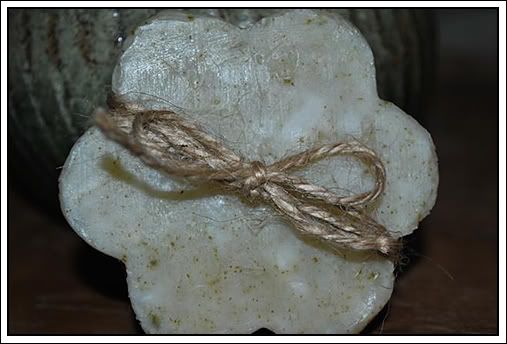
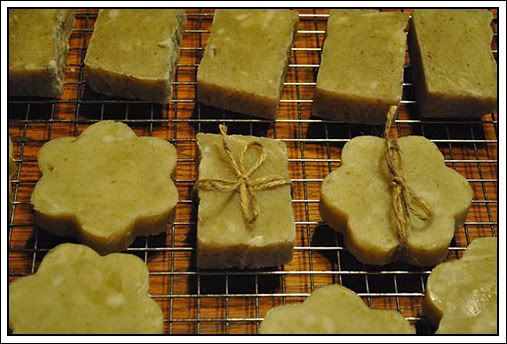
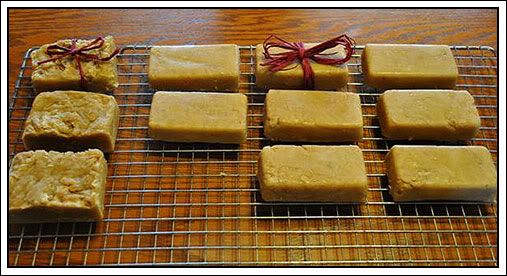
Ever wonder what to do with your homemade or even bought soap scraps? Make soap balls! They looks so cute on your bathroom counter in a little basket. Just grab one and wash your hands. I made these yesterday using my scraps from making soap and a bar of plain old homemade lye soap I bought at the Amish variety store. You can use all scraps, I just didn't have enough.
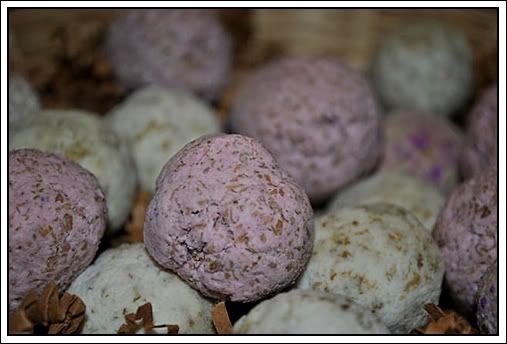
Grate your soap scraps so they are in small pieces. You will need about a cup full. Put in a microwave safe bowl. Add 1/8 to 1/4 cup of water and stir. You don't want it runny but enough to soften the soap pieces. Place in microwave for about a minute, stirring occasionally until soap is melted. This ensures that all soap is melted and additives get mixed well especially if you are adding color. (Please see addendum for alternate ways to soften your soap). Add fragrance, color, ground oatmeal, whatever additives you want and stir. If it's too dry add a tiny bit more water. Let sit until the soap starts to cool and you can roll it into balls. Place on wax paper to harden. Make sure your kids know it's soap, not candy because it looks good enough to eat. Let them sit for a couple of days or longer to dry out some (or stick them in your dehydrator for an hour like I did!)
Editing to add:
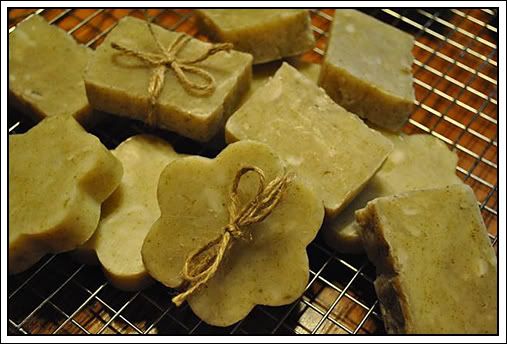
After doing some more research on making soap balls, it is suggested that you use similar colors and similar scents for your soap balls so you don't end up with ugly colored soap or some weird perfume-like smell (or) buy plain white bars of soap and add your own additives to your soap balls.
I have also found many tutorials that skip the microwave step all together and I will definitely be trying this method as well. Grate your soap, add about a tablespoon of water and let sit for 15 minutes to soften. Add your scent, color and additives if you want to add them (or leave the soap as is). You may need to add more water if too dry or wait a little longer if too wet to get soap to ball-forming consistency. Roll into balls, put on a wax paper-lined cookie sheet. Allow soap balls to dry. This could take up to 2 weeks but generally takes about 2 days. Reshape the balls once a day so they keep their round shape.
So there are your alternatives. Either way you have soap balls!
Have fun making them!
I have started a page on Facebook for beginning soap makers. Please join us if you're interested in making your own soap or have ideas to share! I am looking forward to learning from you and with you! You can click on the Facebook badge in the right sidebar or follow the link below to get there.
Soapmaking for Beginners
For those of you hooked on soapmaking, here's a little something you can use. I have mine in my sidebar and it links to all my blog posts that have the soapmaking label. You can do it that way on your blog or just use it as an image. Please right click and save the one you want to your computer then use it how every you like.

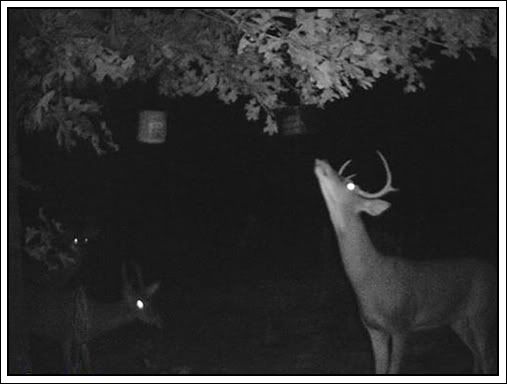
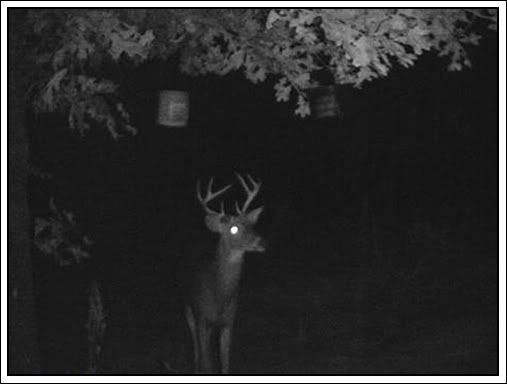
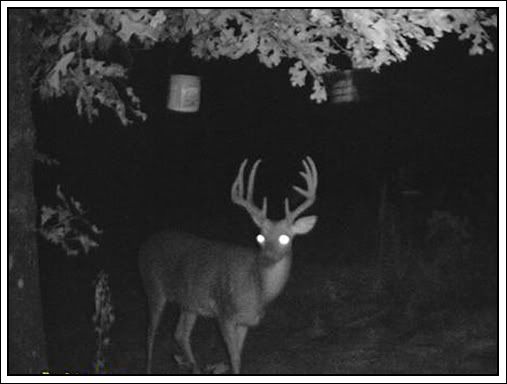
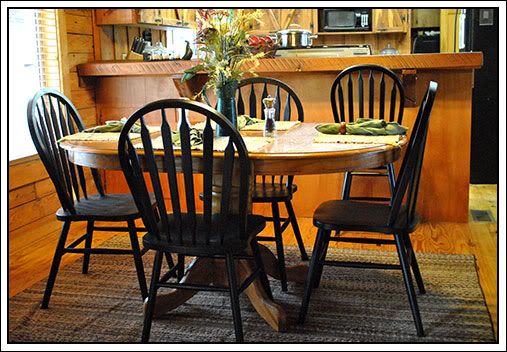
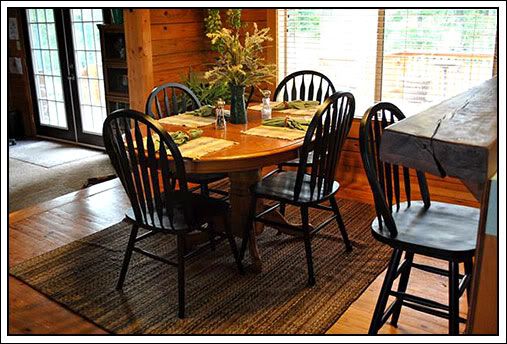
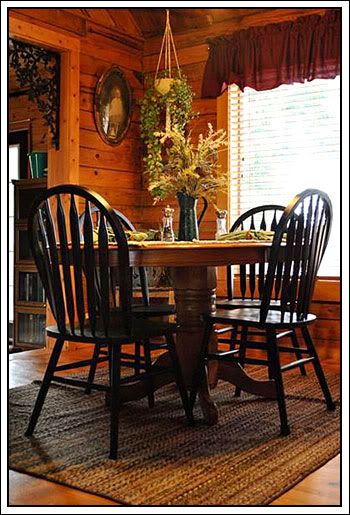
it was going to be this hard to leave these three guys. I leave tomorrow afternoon and I'll be back Sunday. I know I'll have a great time with my sister and friends but Sunday seems so far away!!
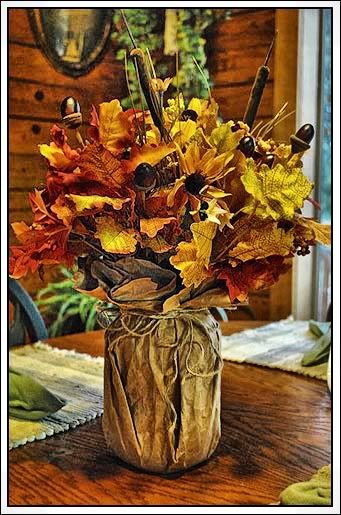
I love fall! I love the colors, the cool weather, the pumpkins, roasting marshmallows on a campfire, and decorating! I am in the soapmaking process as promised with all ingredients measured and the goat milk thawing to a slush on the counter but in the meantime I thought I'd post a cute little crafty thing I came up with last night. I'm sure this has been done a thousand times and you can find many variations on the internet but this one I thought of all by myself so I had to share.
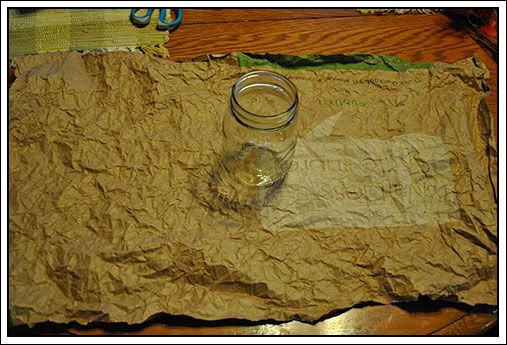
The boys were playing with a roll of shipping paper last night and I was in the kitchen trying to find the right vase for the fall flower stems I picked up at the Dollar General Store yesterday. I had a quart canning jar in my hand but was trying to find something to keep the stems from showing through the glass. I glanced to check on the boys and had an "ah-ha" moment. Don't you love those? They weren't happy that I took their roll of shipping paper. For quart jars like the on in the top photo you will need shipping paper cut to size but for pints you can use a paper grocery bag like I did in the following instructions. It's just the right size.
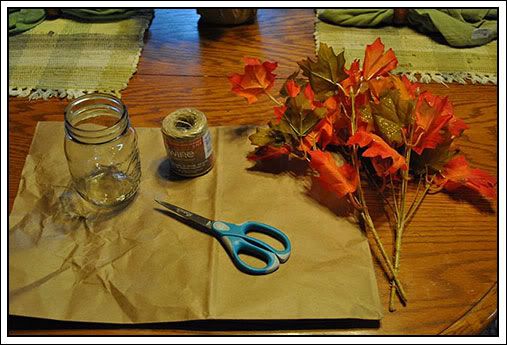
Here's what you need... scissors, twine, paper bag, flower stems and a jar.
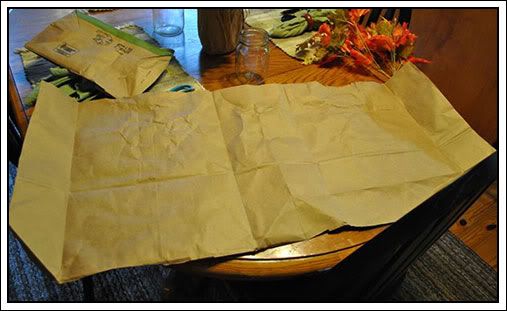
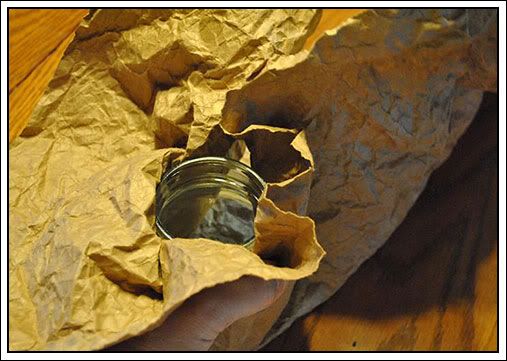
Cut down one side of the bag where the fold is and cut out the bottom. You won't need it.
Now take the bag and wad it up...go ahead...crush it....just don't rip it. Roll it, squash it, crush it until it's soft. It took me four minutes to get the paper all softened up while I was catching up on some blog reading this morning.
Now sit your jar on the side with graphics if your bag has them and start pulling the paper up and around the jar pressing the wrinkles down flat. It will have wrinkles. This gives it character!
Pull it all up on top and tie a string around the neck of the jar. I find this easier to do if I hold the jar between my knees. No, there's no picture of me with a jar between my knees! Okay, there was but taken from above my feet looked really silly and I refuse to post it.
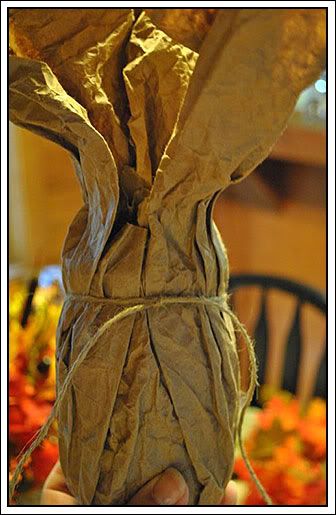
When it's all tied up, trim off the top about 2 inches from the string. You want a little extra there so you can shape it up. Fold the top lip back and trim it up evenly with scissors leaving about an inch above the string.
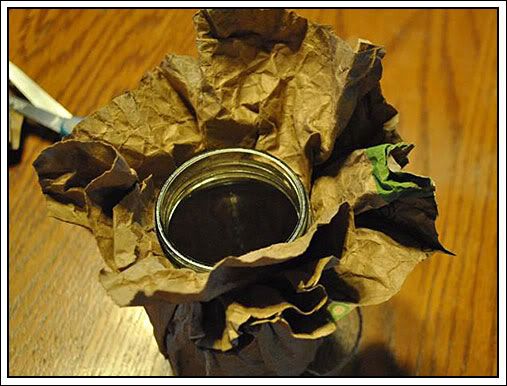
(Pic before trimming)
Tie your twine in a cute bow or add some raffia like I did. Throw in some flower or leaf stems. This one just has leaves.
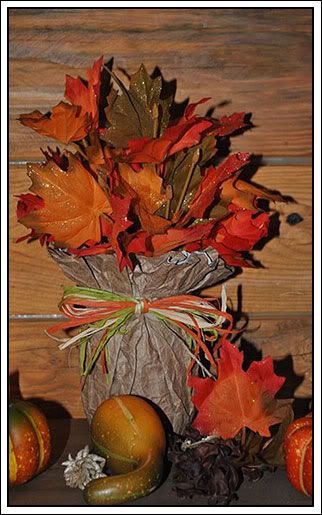
Decorate for fall and enjoy the colors!
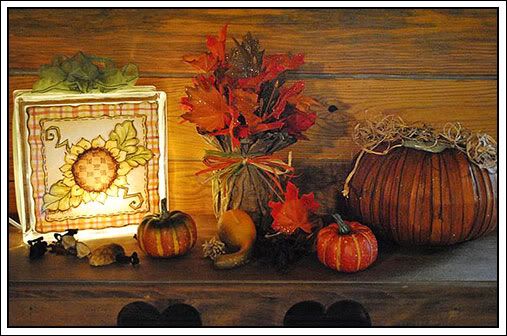
I made that fall/sunflower light block last year. I think they go well together.
Any paper could be used to make there. Tissue paper would give you a wide variety of colors to work with. Newspaper would be an interesting twist. I prefer the paper bag look for fall.
If you try this, feel free to come back and share a link to your pics. I'd love to see them!
As I was flipping through an old album last night I saw this. I couldn't believe it was right there after doing my lard post yesterday. I just had to share it. This is my Mamaw standing next to the lard kettle that they made lard in every Fall/Winter. It stayed flipped over like that until time to use it. I can also remember her making lye soap in the kitchen and saying, "Stand back child this stuff might burn you!" I now realize she was mixing her lye at the time without goggles or gloves.
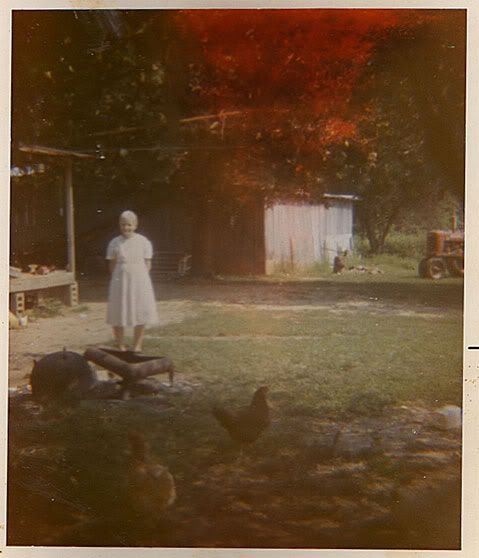
I loved this woman so much! She was my best friend. She kept me while my mom and dad worked during the week. She taught me to make homemade biscuits and to scramble eggs on a little wood stove before I was old enough to go to school. My love for animals came from my Mamaw. She had chickens, guineas, turkeys, cats, dogs, pigs, cows and goats. She sewed little clothes for my Barbie dolls and we dressed the cats up in them. And when I spent the night with her, she would tell me story after story until I fell asleep.
My heart shattered into a million pieces when she passed away. I was 10-years old, I had never lost anyone close to me and remembering that sadness still brings tears to my eyes, but I know she would be proud that I garden, can, raise animals and hang my clothes on the line to dry and that I am so often reminded of her in my daily life.
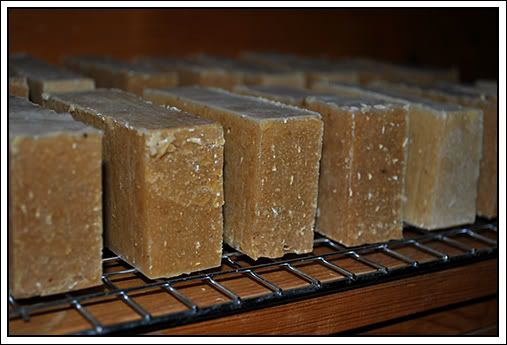
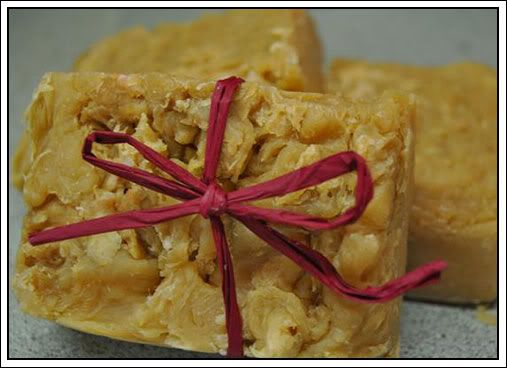
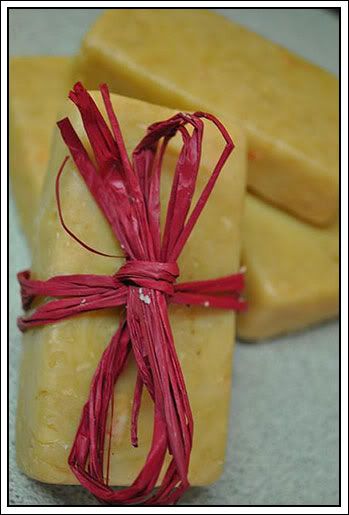
Yes, you read that right. I am rendering lard! Suzanne over at Chickens in the Road has convinced me that I MUST make soap! Considering that I have a large supply of goat milk from Miss Bella, I must make goat milk soap! I am hoping to have an end product that's something like Suzanne's Vanilla Sugar Dreams soap. I have to give credit to CindyP over at Chippewa Creek: Our Life Simplified for her help as well and for giving me the courage to try this! You can find both Suzanne and CindyP's blog buttons in the left sidebar.
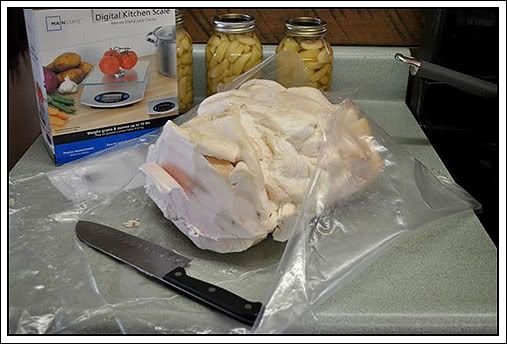
The first step was to gather all of my ingredients and I quickly realized that I only had a pint jar of lard. I render my own lard from pork fat. This particular pork fat came from the meat hog we had butchered last winter. My mom helped herself to a large jar of my already rendered lard last time she was here so I'm running a little short. She likes to partake in the fruits of my labor. Last week she left with 2 dozen eggs, a quart of apple pie filling and 3 pints of various jellies but that's okay because I left her house Sunday with 2 quarts of pickled okra, 1 quart of dill pickles and a pint of watermelon rind preserves.
Just in case you ever find yourself with an excess of pork fat (or any other animal fat for that matter) it's not hard to turn it into beautiful, white, creamy lard. Lard makes the best pie crusts by the way. I don't use it much to cook much because of my cholesterol but I do use it for making suet for the birds during the winter and now I'll be using it for making soap.
As a child I remember the men in my Dad's family getting together each winter and killing hogs. My grandmother, mom and the other women would be stoking that fire underneath a huge cast iron kettle just waiting for the hog fat.
This what hog fat looks like right off the hog and thrown in the freezer...
Hours of cooking and stirring would yield lard and those little crunchy things called cracklings! How many of you ate cracklings while hanging onto your grandmother or mother's apron tail when you were a child?
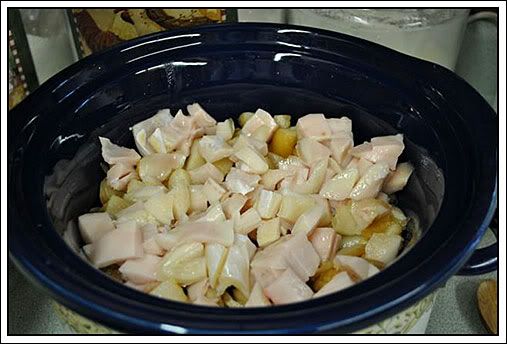
I don't quite go to the iron-kettle-over-the-fire-pit extreme but I do cut up my tallow into 1/4 to 1/2-inch pieces, put it in my crock pot with small amount of water just to get it started.
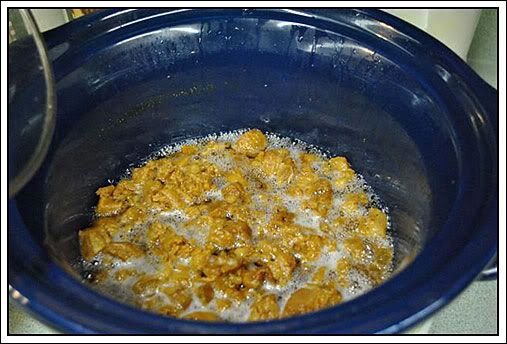
It will take a several hours in the crock pot to completely melt the fat. I have also used the stove top method for quick rendering but you have to keep a much closer eye on it because it cooks fast. There's also the oven method. You put your cut up fat into a large oven-safe pot, cover with a lid and put in the oven. Set temp at around 300 degrees and leave until fat is melted then go to the next step. This method also takes several hours depending on the amount of fat and the size of the pieces.
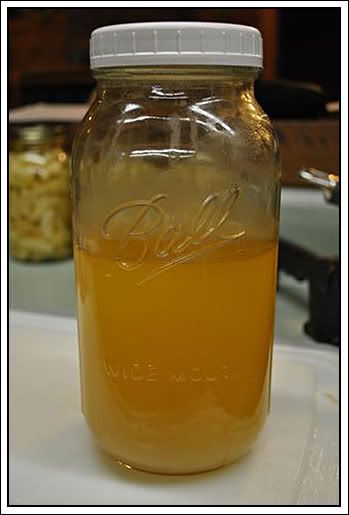
However you choose to melt your tallow, once melted, strain the liquid off into jars, cap and store in the refrigerator.
Put the small pieces back into the pot and cook them a while longer until they turn into crunchy little cracklings. Drain the rest of the grease and put the pieces on paper towels to finish draining. You can use cracklings in cornbread, as toppings sprinkled on other dishes, etc.
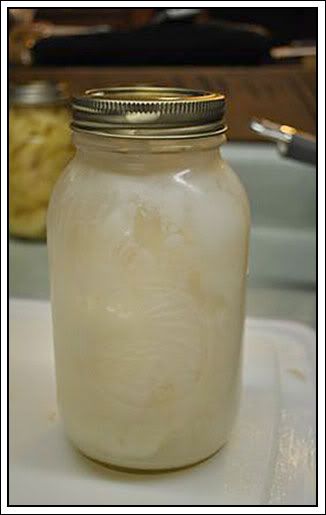
Here's my rendered lard just starting to turn a little white at the bottom after cooling in the refrigerator for a couple of hours. By morning it will look like this.
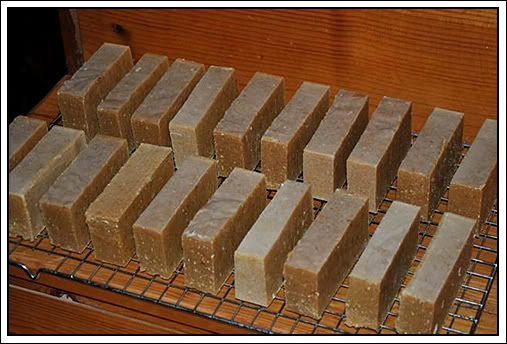
Now I have plenty of lard for making soap. I plan on making my first goat milk soap tomorrow! Follow along and I'll let you know how it goes! Wish me luck!
ANNOUNCEMENTS
For those of you who are new followers/readers, don't forget to check out the forum and join in on our discussions there.
My Country Blog of This and That Forum
I love each and every comment my blogging friends leave for me!
All images and graphics on this page were made by me with the exception of that little rooster! He came from Beth Logan's Checkered Chickens at pccrafter.com. Photos were taken by me and graphics were created using Photoshop CS2.
If you see something you like please ask for permission before using it!
Thank you!